Stay warm outdoors all night: Useful tips for building a self-feeding camp fire
06/28/2018 / By Zoey Sky
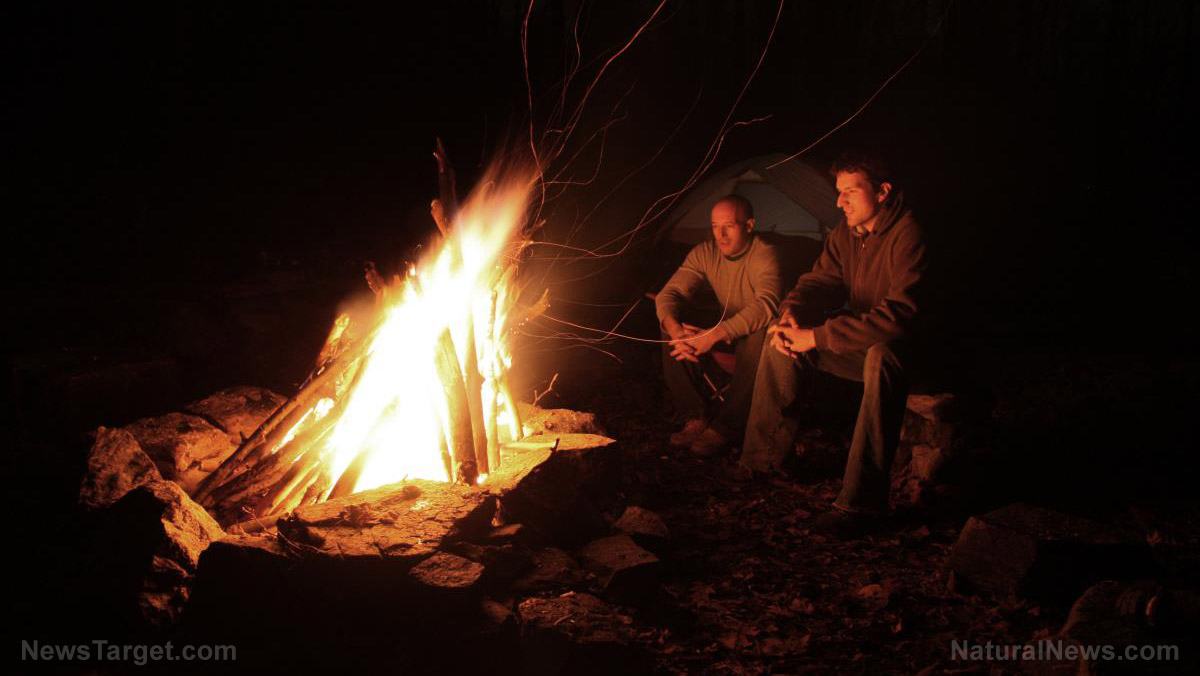
Every survivalist worth their salt will tell you that knowing how to build a proper camp fire is an important skill to learn. It can keep you warm in cold weather, protect you from wild animals, and you can use it to cook. But did you know that there is a way to build a camp fire that doesn’t need to be constantly tended?
What is a self-feeding camp fire?
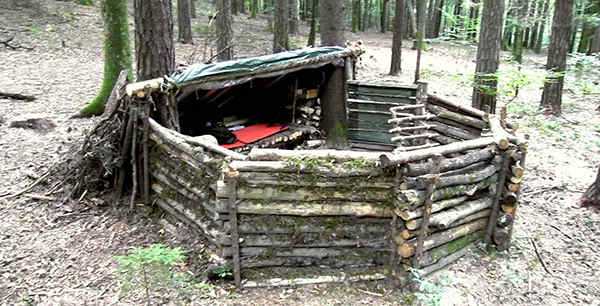
Building a self-feeding camp fire is not too complicated. Try to imagine a candle and how it burns. Take note of how the wick remains alight and how it “burns down into the wax” very slowly.
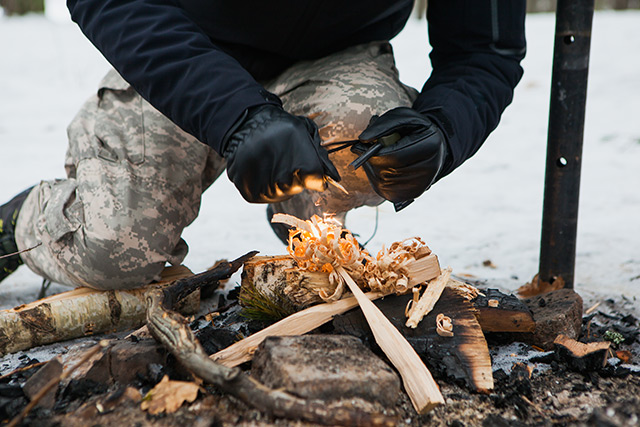
When building a fire, you must first make a pile of fuel wood. Put the biggest pieces on the bottom and the smaller pieces on top. Once you’ve constructed a large and solid platform using the wood, start a very small fire on the top of the pile, which will create a small bed of coals.
The coals will “gain strength as they slowly burn down through the many layers of fuel wood” the same way that a candle wick burns through wax. If you use a lot of wood, your fire will burn longer. Since it’s burning down, you won’t have to add more wood to keep the fire going. (Related: Grid down? 6 Ways to cook when there’s absolutely no electricity.)
- Place the biggest pieces of wood in the bottom of the pile — Take the largest fuel wood that you have and arrange them in a row.
- Build the next layer — When adding more layers of fuel wood, make them perpendicular to the layer under it. Don’t forget to sort the wood in each layer by size that decreases as you add more fuel.
- Put the tinder on top — Once you’re done stacking the wood, put the tinder bundle on top in the center of the pile. You can use a couple of handfuls of dry pine needles for the tinder.
- Construct a small teepee — Protect your tinder bundle from the wind with a small teepee. It only needs to be big enough to make a small bed of coals, so don’t overbuild the teepee.
- Light the fire — When you first light the camp fire, it will need some tending for several minutes. Make sure that enough air reaches inside the teepee so it can ignite properly.
- Let the fire burn — Once you’re done, you don’t need to watch the self-feeding camp fire. It can burn on its own, but you can change the duration by adding or removing fuel wood.
How to put out camp fires properly
Now that you know how to build a self-feeding camp fire, don’t forget the steps to properly putting out fires:
- Let the fire burn down to ash. Use a long stick or a shovel to separate the wood from charcoal, which will help slow down the fire.
- Sprinkle water on the fire and the embers. Don’t forget to wet the embers, but do this carefully to avoid the pockets of air in the camp fire that can “hiss and spit” at you. If there’s too much smoke, wait a bit and try again.
- Add water until the hissing stops.
- Use a shovel to stir the embers and ash. Make sure everything in the fire is damp or wet.
- If you need more water for steps two to four, sprinkle some dirt or sand. You need to cut off the oxygen completely so the embers die out all the way. Never bury the fire with dirt because a buried fire can smolder and re-ignite.
- Check to see if the fire has completely gone out. If it’s cool to the touch, then it’s safe to leave it. If it’s hot, you need to try again. If you see any bright spots in the embers when you poke it with a stick, wet the campfire again.
You can learn more about prepping and survival at Bugout.news.
Sources include:
Tagged Under: camp fire, camping, guides, how to, preparedness, prepper, Preppers, prepping, self-feeding camp fire, self-feeding campfire, survival, wilderness